
This past year, when my son was 5-years-old, we were heading home from a stay in Arizona, when we drove through Cabazan, CA. Of course we had to stop and see the giant Cabazon dinosaurs!

We had a lot of fun checking out these huge beasts! And I believe it was this pit stop that fueled the idea for a dinosaur themed birthday party!

A few months after our stop, I'd asked my son what kind of birthday party he wanted to have this year. I'm pretty sure that visions of the Cabazan dinosaurs danced through his head because it didn't take much for him to shout out that he wanted a dinosaur themed birthday party!

Once he decided on dinosaurs, I secretly jumped with glee on the inside because there is SO MUCH that can be done with that theme and who knows if he'd still be into dinosaurs next year, so I ran with it!

With the theme decided, off to Pinterest I went. I created my "Dinosaur Party Ideas" board and started researching and pinning away! There's a lot of great ideas out there! People are so clever! So many dinosaur ideas, so little time!

Invitations:
The next order of business, once we decided on the theme, was to get the "Save the Dates" and the actual invitations out to the guests.
For the past two birthday parties I've thrown, I used Evite invitations simply because I ran out of time. I couldn't get them into the mail fast enough to get the party date on everyone's calendar.
This year I really wanted to design the invitations myself and actually mail paper invitations. Luckily I started planning early enough to do this.
I love invitation designs that incorporate different fonts in different sizes. I also like dinosaurs in silhouette. The fact that these "party-goer" dinos are adorned in party hats, balloons and are carrying gifts makes these "serious" silhouette dinos look pretty silly.
Here's what I came up with:
 |
| Example |
 |
| Purchase your own customized invitations from my Etsy shop HERE |
I did end up sending a "Save-the-Date" notification via Evite, just to get the date on everyone's calendar. Evite had two kinds of dinosaur-themed invites to choose from: a T-rex and a Stegosaurus. We used the "meat eater" T-Rex one, of course!
 |
| Evite Dinosaur Invitations to use as Save-the-Dates |
I knew that I was going to make a volcano cake for the party, and I also wanted to incorporate the elements of a "caution" sign, like this "Dinosaur Crossing" sign, into the invitation, similar to this:
 |
| A digital version of this sign can be purchased in my Etsy shop HERE |
So, to incorporate all this I added a "Caution: Cake Ahead" sign element into the invitation:

I also created these matching "caution volcano birthday cake" stickers to seal the invitation envelopes with, in the same "caution" sign style:
 | |
| This sticker template available for sale in my Etsy shop HERE |

I also created these birthday "party-goer" dinosaur silhouette stickers to use on the invitations, as well. I bagged up the extras into small ziplock jewelry bags and added them to the party favor bags for the kids to take home.
 |
| This sticker template available for sale in my Etsy shop HERE |
To help tie in the "caution" theme into the party decor, I also created a larger version of the "caution lava cake" stickers, as a "Caution: Cake Ahead" sign to hang near the volcano lava cake that I made for the party.
 |
| You can purchase this lava cake sign template HERE |
Decorations:
Explorer Hats for the Dinosaur Fossil Excavators:
One of the activities that I had planned was for the kids to go on a dinosaur dig. Which of course meant that they had to have explorer hats! I purchased the actual hats, but I let each child decorate their own with foam stickers that I found at Michael's!

But first... So originally, I wanted to make dinosaur party hats for the party guests, like these:
 |
| SOURCE |
Or these (so cute!):
 |
| SOURCE |
But with 18 kids who RSVPed, I knew that 18 handmade party hats would take way too too long and be out of the question.
So, I was at a party supply store when I saw these explorer hats and knew they would be perfect! They were thin plastic and not too expensive. And then I remembered this decorating idea on Pinterest...
 |
| SOURCE |
...and thought what a great idea to let the kids decorate their own hats! So I picked up about 20 hats and some foam dinosaur and letters stickers, which I found at the craft store.

I loved that they could customize them with their own names, using the foam letter stickers. So in one swoop, the party hats and one party activity were checked of my to-do list!
Party Signs:
A few months back, my friends and I threw a Paleo-themed surprise party and had I created these yellow silhouette signs to use as decor for the party.
 |
| Digital versions of these signs are for sale and available for download in my Etsy shop HERE |
I printed them out onto yellow and white card stock, cut out cardboard a bit smaller than the signs, then glued them onto the cardboard backing and then I staple gunned them to sticks that I had picked up from the scrap bin at Home Depot. I also had them cut the bottoms into points so that I could easily push them into the ground.

 |
| Sticks with cardboard stapled on, before gluing the signs on. |
More Decor...
I needed more decor that just the signs, so I stopped at a thrift store to see if I could find some dinosaur related items to decorate the party with. I not only found a bag of toy dinosaurs, but I was really lucky in that I found a set of twin dinosaur footprint patterned sheets and a dinosaur print tablecloth! I used these to cover three of the 6-foot tables we had set up for the party. I especially loved the fitted sheet because it slipped right on and fit perfectly snug onto the table!
 |
| And bonus, we used the sheets on my son's twin bed after the party! |
Burlap and Paper Palm Trees:
I wanted our place to feel like a jungle and I first saw an idea for palm trees, similar to this HERE. She used streamers for the tree trunks of the palm trees, but we have these pillars in our dining room area that I thought would look great wrapped with strips of burlap! We have 8 pillars, so I wrapped 4 of them. I also put some burlap at the base, and set some of the toy dinosaurs on it:

I also had these huge leftover sheets of paper from another project, in green, (purchased from Kelly Paper) so I cut out huge palm fonds, using THIS "feather" template, which looked like palm fronds to me, and then pinned them to the ceiling with standard push pins.
This picture below shows the huge pieces of paper I purchased, along with the template printed on a 8 1/2" x 11" sheet of paper. You can see how large the green paper is compared to the template. I folded it in 1/2 lengthwise and then 1/2 lengthwise again, so that I could make 4 palm fronds on each sheet. I didn't trace, I just sort of sketched it out on one panel, then cut while it was folded:
 |
| 4 palm fronds per palm tree |
"Happy Birthday" banners:
I wanted to make my own dinosaur themed pennant banner, but I found a super-cute "Happy Birthday" banner made out of FELT, at Target, of all places! I love felt, so I was sold! And it was in all the right party-theme colors, too! HERE's the link to the banner. And here's the only shot we got of it, during the party.
 |
| "APPY BIRTHDAY" everyone! |
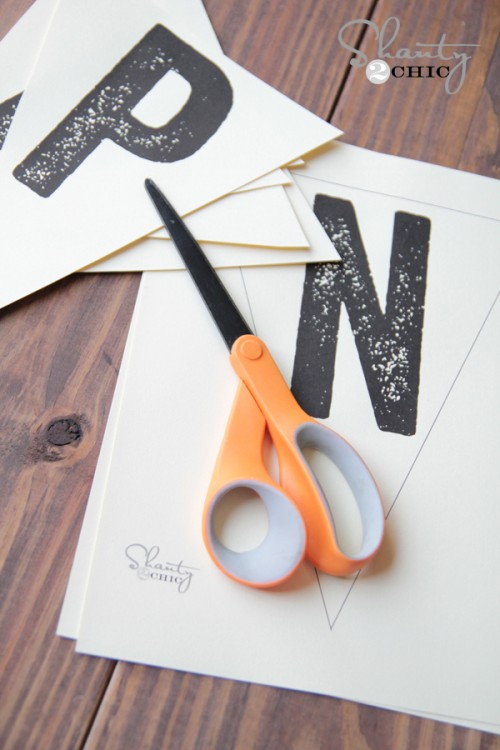
But I did stumble across THIS free printable banner, on the shanty-2-chic.com blog, with each letter in the alphabet, numbers and a couple of punctuation marks. I like how the font is just rustic enough for a dinosaur feel and that you can print it onto whatever color cardstock that will match your party theme!
Jurassic Art:
I originally wanted to print out very large dinosaur-themed coloring page posters and put them up all over the walls. My idea was to print the coloring pages out HUGE as Engineering prints, at Staples or Office Depot. These prints run from about $2 to almost $8. But I was afraid that the kids might not stay in the lines and give our walls a little bit too much color.

Then I'd remembered that my son had a "how to draw" book, including an entire section on dinosaurs! This is a great how-to-draw book with step-by-step instructions on how to draw different things:

I really wanted a drawing/coloring element during the party. So I made photocopies of the how-to pages from the dinosaur section, and taped them up around a large sheet cut from a paper roll that I'd purchased from IKEA (HERE). See photo above.
Then I altered this "Jurassic Art" coloring page (see original source HERE) to use as a sign for the "Art Station", using the Jurassic Park font (you can download the Jurassic Park font for free HERE).
 |
| To purchase this sign, please visit my Etsy shop HERE |
For the drawing pages, you can purchase this book, "I Can Draw..." by Terry Longhurst, HERE, and make photocopies. There is also a "I Can Draw Dinosaurs" book, by the same author, HERE. And here is what the step-by-step instructions look like:

I was afraid that the activity wouldn't "draw" too much interest or that it might be too advanced for the 5 & 6 year olds, but I really wanted to have a drawing or coloring element during the party. And I really like the idea of kids being able to draw on the wall! I mean, how fun is that?
 |
| I used THIS green painters tape, to match the dino themed decor! |
I was pleasantly surprised because this was one of the first stations that the kids stopped at and they seemed to love it! Here is some of their artwork:


Party Containers:
I bought some dollar store containers in green, and decorated them with these silhouette dinosaur-themed party-goers that I printed out on sticker paper and cut out with a circle cutter.
I used the buckets to hold the prizes during the dino dig and some of the items at the table, such as the plasticware and napkins.

For these circle stickers, I designed each silhouette dinosaur party-goer. There is a tyrannosaurus rex, ankylosaurus, stegosaurus, triceratops, coelophysis and brontosaurus, each with their own party hat, balloons and a wrapped gift! LOL!
 |
| This template is now for sale in my Etsy shop HERE. |
They matched the invites and the party signs and I love when the decor ties in with the invitations!
DIY: Dinosaur Egg Story Time, Egg Hunt and Trading Post:

I also needed a way to distract the kids while the eggs were hidden, because I couldn't really hide them until just before the hunt. I figured the kids still liked to have stories read to them at this age, so story time would be the perfect time for a distraction and egg hiding!
"The Dinosaur Eggs" Storytime:
I gathered the kids around for story-time, and read them a book called "The Dinosaur Eggs" by Francis Mosley. The book is about a couple who found 3 eggs, out of which eventually hatched 3 dinosaurs, and their adventures of raising these "dino babies". The kids really liked trying to guess what the new parents tried to feed their dinosaurs and what kind of story these dinosaurs wanted to hear at bedtime.

While they were distracted by the story, I had a few of the dads hide the filled dino eggs. They hid both the plastic and baking soda eggs (see more about these eggs below), while I passed out the Egg Hunt bags and had the kids write their names on their bags.
These were made out of regular paper lunch bags and a label that I created using the "party-goer" dinosaur holding a basket and following a trail of dinosaur eggs. I cut out the labels and glued them on to the bags with a glue stick:

DIY: Plastic "Dinosaur" Eggs for Egg Hunt
How can you tell the difference between a regular Easter egg and a dinosaur eggs? By their polka dots, of course! Since it was November, I was not able to find any plastic Easter eggs but God love eBay, I was able to buy some there, just in time for the party. I bought four bags of eggs, two bags of large and two bags of small:

I used standard acrylic paint and a circle shaped sponge (I used the Martha Stewart set HERE, but I've also seen a plain old regular set at Hobby Lobby) and started "polka dotting" away!

Let dry. Which didn't take long:

Fill with treats, hide the eggs and thrill the kids!

DIY Baking Soda Eggs:
I was scouring Pinterest for party activity ideas when I came across THIS pin about making dinosaur eggs out of baking soda, with a surprise inside, or Magical Hatching Dinosaur Eggs. The best part is that the kids could break them open and squirt them with vinegar to make them bubble, fizz and desolve! How fun is that? I knew I had to try this!
Supplies:
* Baking soda (I got a giant bag at Costco and didn't even use 1/2 the bag)
* water
* glass bowl
* food coloring (I used gel food coloring, found in the cake section at craft stores)
* mini prizes
* cardboard box for drying the eggs

Mix baking soda, water and gel food coloring into glass bowl:

Mix until desired consistency, adding baking soda or water to get it fairly dry, but wet enough to be able to mold into an egg shape.

Press prize into egg:

And fold up and over the prize or add more of the mixture to cover the prize. Sometimes the tails would poke out and I would either add more of the mixture over it, or just leave the tails out, because it was sort of cute!
 |
| My son loved helping make the eggs |
Press into an egg shape, set into box to dry:

Let dry overnight:

And voila!

Baking Soda Eggs in Action:

Before the hunt, I had asked the kids, especially the older ones, to make sure that they only collected 2 baking soda eggs per person, and I kept a couple aside, just in case someone didn't get one.
Once the kids had finished the egg hunt, it was time for them to break open the baking soda eggs to see what was inside!
I also set out a bucket of tools (sticks, brushes, magnifying glasses) for the kids to use to break their baking soda eggs open.


I filled a bunch of dollar store squirt bottles with vinegar, so when the kids squirted the baking eggs, the vinegar reacted with the baking soda and fizzed up, dissolving the baking soda and slowly revealing the prize inside! It was so cool!


Dinosaur Party Trading Post:

I filled the Egg Hunt eggs (both the plastic ones and baking soda ones) with an assortment of dinosaur trinkets, like plastic dinosaurs, dinosaur erasers, dinosaur stickers, plastic jewels (because it's not a treasure hunt without jewels), and some plastic gold coins. I purchased most of the trinket items from US Toys and Party City.

I knew that not all the kids would like all their "prizes" so I set up a Trading Post for them to be able to go trade the items that they didn't want, for items that they did want. And if they got a gold coin they could use it to "buy" an item at the trading post. I wasn't sure if they were going to get the concept or want to even to do it, but they did and they seemed thrilled!
I collected plastic containers (Red Vine licorice & Trader Joe's cookie containers) to put the trinkets in, for the trading. I wanted to use clear containers so the kids could easily see what was available. If I would have had more time I would have printed up THESE labels onto sticker paper, to cover up those candy and cookie labels.

I think Grandma was in her element. She had a blast helping the kids with their trading!
I also picked up this coin bank at the dollar store for the kids to put their found gold coins into when they "purchased" an item:

Again, if I'd had more time, I would have covered it up with some paper and maybe some dino-related stickers.
Volcano Crown:
I love the idea of having a crown for the birthday kid!

But it's tricky to get a "boy crown" just right.
I originally wanted to do some sort of dinosaur crown, but then I saw this volcano party hat:
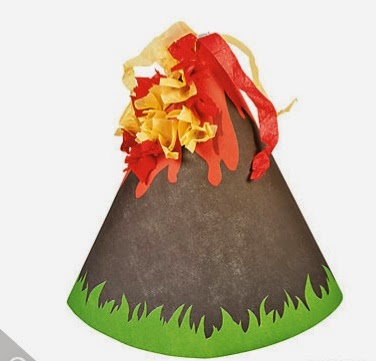 |
| SOURCE |
I thought this was so cute, but really wanted him to have an actual crown! Then I thought why not MAKE a volcano crown!? Especially since the mountains could represent the spires on the crown. I scoured Pinterest and the internet, and surprisingly didn't see any volcano crowns, so I designed my own!

It took me a few tries to get the crown design just right. These are attempt #s 1, 2 and 3.

I finally got it right on the fourth try.

I loved how it turned out! I loved the "shooting or erupting lava", the flying pterodactyl, and especially because the "lava" was so glittery!
DIY: Volcano Crown
To make your own, you will need:
* Volcano crown template (template and tutorial sold in my Etsy shop HERE)
* tape
* glitter (in red, orange and yellow)
* glue
* sparkly gold pipe cleaner
* glue gun
* scissors and a paper cutter (optional)
 |
| Template shown here isn't the final version of template sold in my Etsy shop. |
 |
| These are the 3 color glitters that I used for the lava. |

Let the glue dry.

Then I started using white glue, for the next section. I think it worked better than the glitter glue. I applied some glue along the red glitter border and then used a toothpick to pull it up and get it into the right shape, near the top.

Then I sprinkled on the orange (Fire Opal) glitter, and let it dry.

While the glue was drying, I worked on the "erupting lava" portion of the crown.
***Insert Jeopardy music here***
~~~~~~~~~~~~~~~~~~~~~~~~~~~~~~~~~~~~~~~~~~~~~~
How to make the "spraying or erupting" lava:
I folded a gold (metallic) pipe cleaner in half, then folded 2 more times on each side, and wrapped one end tight with leftover pipe cleaner, so that it looked like a fan, to prep it for gluing to the crown. Once the glue is dry on all three glitter colors, glue to narrow (a.k.a. wrapped) end of the lava spray, to the back of the middle peak (front and center of the crown).
~~~~~~~~~~~~~~~~~~~~~~~~~~~~~~~~~~~~~~~~~~~~~~
Back to the crown....
Then I repeated the glue/glitter process with the yellow/gold colored glitter, called "Yellow Barite".

Once everything dried, including the erupting lava piece, I added my son's name in gold letter stickers that I'd purchased from the scrap-booking sticker section at Micheal's. I added them across the middle front of the crown. I started with the middle letter first, and worked outwards, to make sure the name was centered. I even cut the letters out individually, with their backings, and spaced them out on the crown, to make sure they fit well.

Then I thought, how cute would it look to have a pterodactyl flying over one of the volcano's, because I had nothing better to do. So I dug around in my jewelry supplies and found this thin but sturdy wire that I could suspend a foam flying dinosaur to. I hot glue gunned the wire to the back of one of the peaks, then poked the wire into the foam pterodactyl. I pulled the wire back out and added some glue and pushed it back in.

Please notice that the pterodactyl is actually a sticker! I didn't want to leave the white sticker backing on, but if I took it off there would be sticky stuff on the back. So I took the sticker back off and sprinkled red glitter on it! Now we have bling on the front and the back of the crown!

I twisted the base of the wire into a spiral to help stabilize it, and used a glue gun to attach it to the back of the peak.
I also wanted to add a big, fat "6" on the crown somewhere, but I didn't have room after I added his name, so I decided to "float" the "6" above the middle peak, like it was shooting up from the lava blast. I used the same method as the pterodactyl with the foam stickers, using the thin wire.
I let my son decorate the crown with the pack of dinosaur themed foam stickers. I even took one of the orange "bush" stickers from the foam sticker pack and used it as a "lava explosion" on top of the remaining peak.
To secure the back of the crown, I wanted to use something stretchy, so that it fit his head snuggly. Again, going through my jewelry supplies, I found some elastic string. (You can purchase this kind of elastic string in the jewelry section of a craft store, like Michael's or JoAnn's or Hobby Lobby. Or you can just use rubberbands and staple them onto the crown ends) I folded down the ends of the crown, for strength, and used a very small hole puncher (Fiskars 1/6" hole punch) and punched 3 holes on each side.

Then I threaded the elastic string through the holes and tied it into a double knot, and then used glue (hot glue gun) to secure it. Though it was a little tricky because the glue can be too hot and melt the elastic string, and be sure to let it cool down completely before testing the stretch.

Easier Option:
If you can't find elastic, you can just use a rubber band instead to secure the ends of the crown. Staple the rubber band onto the ends of the crown, like this example below. Much easier!

Dinoculars:
I thought "dinoculars" would be so fun for the Dinosaur Egg Hunt! What are dinoculars, you ask? Just binoculars ESPECIALLY made for dinosaur hunting!

If you want to make these, start collecting toilet paper rolls right now!! You'll need 2 per child attending the party. You can also join your local Freecycle.org group and see if you can get a bunch there. Or you can purchase some Kraft paper (or any color cardstock) and cut out rectangles about 4.5" x 5.25", glue, tape or staple them together and make your own rolls.

Quick instructions:
Cut out two (about) 5"x7" pieces of wrapping paper, glue stick them onto 2 empty toilet paper rolls. Then, using a hot glue gun, glue the 2 toilet paper rolls together (or you can staple them together), punch holes in the outer sides, add coordinating ribbon for the neck strap and you can even add some cute washi tape for decoration.


I first found the idea for these dinoculars HERE. But you can also look on Pinterest and on Google for more ideas.
Dinosaur Races:
I saw this super cute DIY craft of dinosaur feet and wanted to somehow incorporate them into the party.

I posted a "Wanted" listing on my local Freecycle.org group and found someone kind enough to save me 6 of these empty Kleenex boxes.

Three at a time, the kids would line up, dino shoes on, and dinosaur egg balanced on their wooden spoons.

I used the larger rectangle dinosaur boxes so that they didn't have to take off their shoes.

Ready, set, GO!! And the hilarity ensued!

DIY:
Make your own Tissue Box Dinosaur Feet:

Supplies:
* 6 large empty rectangle tissue boxes (or however may sets you need, 6 made 3 sets)
* large eggs (I found these paper mache covered plastic ones at Hobby Lobby, in the wood or floral section - $2 each)
* white glue or Modpodge
* paintbrush
* colored tissue paper
* foam sheets or stars
* scissors or Xacto knife

Select two coordinating (or not!) colors and cut or tear them into medium sized pieces (tip of the day: The larger the pieces, the less you will need to glue on!)

Using the brush, brush glue or Modpodge to the box, lay tissue piece on, brush glue over it and smash down onto the tissue box. Keep adding pieces until you cannot see the box underneath.

Let dry and take a break to play with dinosaurs...

Do the same with the eggs:

We had a box of foam stars, so we cut "dino toenails" out of them (you can also cut triangles out of foam sheets - any color!):

My son was THRILLED that he accidently made a a dino footprint on his egg and insisted we leave it and not cover it up:

I cut narrow rectangles in the toe area and pushed the "toenails" through, gluing the part left inside to the roof of the shoe:

DIY: Pterodactyl Feet for the tissue dino shoe boxes:

The birthday boy wanted to make pterodactyl feet, so he cut out some wings to match the shoe:

And we attached them the same way we attached the dino toenails. Cut openings into the outsides of the side of the dino shoes, glue the ends to the wings onto the roof of the inner shoe.
Dinosaur Dig and Excavation Pit Puzzle:

I love the idea of kids being able to search for treasure. Hence the dinosaur egg hunt and this dinosaur dig excavation pit PUZZLE game! How fun for the kids to dig through sand and find dinosaur bones! I saw a party with an excavation on Pinterest, and saw that the kids were putting the pieces together, which reminded me of putting together a puzzle, hence the following idea was born!
I was originally looking for 3 types of dinosaurs that I could make the bones out of, but I could only find the T-Rex sand molds. But I wanted to do more than one set of bones, because I knew that there would be quite a few kids at the party. Since they were all the same dinosaur type, wouldn't it be fun if each T-Rex was it's own color? But then, where they would assemble the "puzzle pieces"?
On a piece of tank board, of course! I didn't know what tank board was either until I found this 36"x48" piece of "tank board" at Home Depot HERE, and it was only $2! It's basically a piece of super thick card stock, but not quite as thick as cardboard.

I also saw these large cardboard sheets in between the paper towel levels at Costco! I'm positive that if you asked, they would give these to you for free! They are a little thinner than the tank board, but would work just as well:

I traced the "sand mold bones set" 3 times, once per color; of course sticking to the party theme colors! Then I wrote "C-Rex Excavation Pit Puzzle" across the board. I thought my son would love then play-on-words and that it said "C-Rex" instead of "T-Rex" in the activity title, since his name starts with a "C".

DIY: Plaster Dinosaur Fossils
I poured 3 sets of fossil molds with plaster of Paris. Get started on this early so that there is enough time to dry between sets.

I originally saw the dinosaur sand molds at Michael's craft store, but they were gone. So I looked online and was able to purchase this one on Amazon. HERE are some listings.
UPDATE!! I just saw this T-Rex sand toy set at Micheal's again (May 2014)! And they were only $5!

Following directions on the Plaster of Paris box, mix the powder with water to pouring consistency. The more water you use the longer it will take to dry, however, it makes life so much easier if it's easy to pour. Worth the drying time to me.
You will have to support some of the smaller pieces or they will tip over when you pour the plaster into them. I used an old towel to hold them up.
We also plopped random blobs of plaster onto the cardboard to represent coprolite, or dinosaur poop, to hide in the fossil dig area. We got a good giggle (or three) out of that one.

Let dry for a few hours.

Pop the pieces out of the molds.
Painting the Dino Dig Puzzle Board:
Now to paint the outlines for the fossil puzzle on to the tank board.
Supplies:
* tank board or large sheet of paper or cardboard
* paint (I used tempura kids paint from my son's stash - in the party theme colors)
* paint brush
* dinosaur fossil molds
* 3 cans of spray paint from Hobby Lobby, in the 3 theme colors, green, yellow and orange

Arrange fossil pieces then outline them with paint.

My son begged to paint the rest of them:


We created some dimension to the puzzle board by lightly painting in ribs, eyes, nostrils and teeth.

The birthday boy was very adamant about positioning the legs on the yellow one to look as if the dinosaur was running.

Once the molded plaster pieces were done, we painted the 3 sets of fossils 3 different colors.
I bought those little cans of spray paint from Hobby Lobby, in the 3 theme colors, green, yellow and orange, and sprayed each set of fossils a different color.

I think next time I'll buy the full size because
there was just barely enough paint in each of the small cans for each set of
fossils, but they did work.


Once all three sets were painted, I arranged the puzzle pieces on the tarp I spread out on the bottom of the makeshift pit. (I bought this tan colored 5 ft. x 5 ft. canvas drop cloth at Home Depot HERE for about $8.) And actually hot glue gunned a lot of the pieces to the tarp, so that the kids really had to use their tools to dig them out. I didn't want them to just plow through and push them all up and out of the sand:
 |
| Arrange and hot glue them down to the tarp, before covering with sand. |
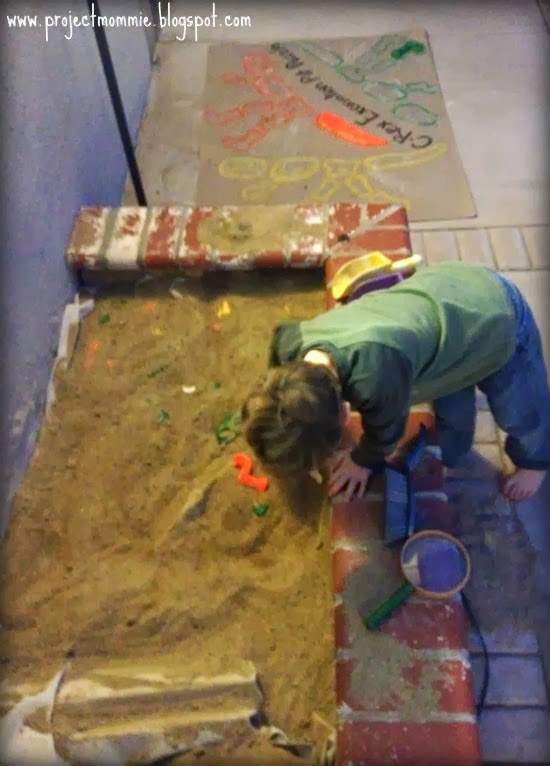
And then I put all of the excavation tools (sand toys, like shovels, rakes, sifters; magnifying glasses, brushes of all sizes, etc.) in one of the dollar store buckets and set it next to the dino dig pit, along with the tank paper, which had the base for the puzzle on it:


And hung one of the engineering prints with "C-REX EXCAVATION PIT" on it, above the pit area:

I used this file to print out 3 of the signs I needed for the party, onto one large engineering print, and cut out each one. These are almost as large as banners, but so much cheaper!
 |
| Download this file for free HERE |
If you don't have a "pit-ready" area to build a dino dig pit and to put the fossils and sand in, I saw these cement mixing tubs at both Home Depot and Lowes for about $5. There were several sizes. Or you can use one of those hard plastic swimming pools, if it's the right season for pools.


I also added a few small dinosaur fossils into the pit that the kids could take home. I picked up THIS Dinosaur Skulls Toob from Joann's (and used a 40% off coupon!), and found a few full-body dinosaur fossils at US Toys (about $1 each) and added them to the pit for fun, letting the kids keep what they found.

Since the kids already had their dino egg hunt bag they were able to just put their fossil findings into their bags.
Food:
I don't ever seem to get a good shot of the food table at my parties, but I did purchase 4 wooden letters: "R, O, A & R" to spell "ROAR"! ("RAWR" would have worked, too, but they didn't have a "W"!) I bought the letters at Micheal's, in the dollar bin section, and they came in the party theme colors, too (yellow, orange and green)! 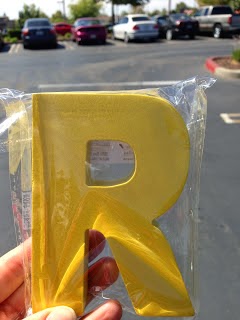 |
| Source |
 |
| Plates purchased at Walmat, but the dollars stores had similar items, too! |
Volcano Cake:
I've always wanted to make a volcano cake; complete with smoke and lava pouring out of it. I love surprising Christian and I knew a working volcano cake would blow his socks off!

I baked a huge rectangle cake, and then a bunch of circle cakes to stack up, so that I could carve a volcano out of it, yet big enough to where I could add a plastic cup which would hold the dry ice.


I put dowels into the circle cake, leaving enough room for the plastic cup, and also placed short dowels into the rectangle cake, where the volcano would sit.

Using the cup itself I pushed it into the cake and cut a circle of cake out, so that I could fit the cup inside. I would be using this cup to hold the dry ice and capture the water and liquid jello that I'd be pouring in for the smoke and lava effect:

I frosted the rectangle base then stacked the circles, carving them to look like a volcano, and then placed it assembled onto the rectangle cake base.

I made chocolate ganach for the very first time and poured it over the cake.

I really wish I would have taken a photo after I'd poured the chocolate ganache on the cake. It was SO. EASY. to work with! It stayed in place even while spreading, and it spread so easily! Even when I "pushed" the ganache over the sides, it perfectly stayed "adhered" to the cake and didn't spill down the sides, but was easily spread along the sides of the cake. I must repeat: SO. EASY. And YUMMY, too!!
Not only was it delicious, but the ganach acted as sort of a waterproof barrier for when the "lava" poured out and kept the cake from getting soggy.
I purchased dry ice at my local Smart and Final Express store. Please be sure to use gloves when handling the ice, or you could get burned! My husband placed the pieces of ice into the plastic cup and then called the kids over for cake!

I had a cup of hot water and a cup of hot jello (dark cherry flavor) ready to pour on disposable coffee cups with lids, but also away from small, curious hands.

I poured a little bit of hot water into the cup of dry ice, which was already inside the cup, in the cake, and voila, the smoke started rolling out of the cup and down the cake. I hadn't tried it yet, but it worked and it was awesome!!

Then I poured some of the hot jello into the cup with the dry ice, and a mass of smokey red lava started pouring out:

The bubbles in the lava would pop and clouds of smoke popped out. It was very cool and the kids were yelling, "Awesome!!", "Look at that!" and "COOL!!!"

It really was pretty awesome, and very cool!


This poster above was printed out as an Engineering Print, at Staples, HERE. They actually gave it to me for free, because of all the lines on the bottom left corner. Worked for me! I found this print on Pinterest HERE, and then uploaded it to my computer and added the "Happy 6th Birthday, Christian!" in "Fossil" font, which you can upload HERE.

Dinosaur Themed Party Favors:
I always like to keep the party favor bag as sugar free as possible, but I do like to add at least one candy item, because, really, what's a party favor bag without candy!?

I knew that I wanted to do dinosaur poop as a party favor, since poop is hilarious. Not only to 6 year olds, but to parents who never really grew up. Not naming any names here. Me? Toilet humor? Noooo... I've seen cute apothecary jars filled with dino poop, and cute bags of dino poop, but most of them used malt balls, which I can stand! Ewww!! But I happen to be at the Dollar Tree, and I saw THESE!!!
 |
| Nestle Buncha Crunch candy pieces |
I'm sorry, but if that doesn't look like poop, then I don't know what does! It was perfect! I bought 10 boxes for $10! And I was able to fill 3 bags per box, so I had more than enough.
 |
| Coprolite, anyone? |
 |
| Front and back of bag toppers |

* THIS template (from my Etsy shop)
* scissors or a paper cutter
* 3" wide self-sealing bags (found in jewelry section at Hobby Lobby, probably Micheal's, too)
* white card stock
* printer
* Nestle Buncha Crunch candy (or any candy that looks like dino poop!)

Directions:
Print template out onto white (cream? light kraft colored?) card stock. Cut them out using scissors or a paper cutter. Fold each card in half, then staple them on to the tops of the plastic bags. Done!
[I was able to fill about three 3" wide self-sealing bags per box of chocolate.]
This also ties in with the "Coprolite Depository" (a.k.a. dinosaur poop dumping station, or restroom!) sign I created for our bathroom door. :D


Dino-"mite" Party Favor Tags:
I made these dinosaur party favor tags that say, "Thank you" and "I hope you had a "dino"mite time!", in both "Caveman" and "Jurassic" fonts, and printed them out onto our party's theme colors.

 |
| Purchase your own digital file in my Etsy shop HERE and print as many as you need! |

Thank You Postcards:
I love matching invitations and thank you cards! I also love thank you cards as postcards, not only to save on postage but to also to save trees!


All he had to do is fill in the gift that he received, and then sign his name next to the heart-shaped fossil bones, then I filled in the name and address, popped on a postcard stamp and dropped them off at the post office.

 |
| I'm selling these postcard in my Etsy shop: HERE |
Please feel free to share you links to your dino parties below! Thank you for letting me share, as party throwing is one of my favorite things to do in the whole world!!
