


This was the first time I'd carved a shape out of cake (for the turtle body) and the first time I've sculpted an animal character face (out of fondant) but they both turned out better than expected! I was so relieved! I figured it was either going to be a disaster or it would go the other way and miraculously turn out great!
I used Wilton fondant for the first time when I was making this cake, as I usually make my own homemade fondant. I tinted it with teal Wilton gel color, for a tropical ocean color. The Wilton brand fondant was really nice to work with and I had no issues with it, thank goodness!
For the front flippers, I used the Wilton leaf cut out set and cut out two leaves to turn into flippers.


I used the largest of the leaf cutters, that where the curve matched up to almost the same as the sides of the 4" cake pan, for the insides of the front flippers, so that they would perfectly line up to the sides of the mini turtle cake, and I used the leaf cutter to trim off the tips of the flipper. I looked up pictures of sea turtles online to get the general idea of the shape of a turtle flipper, and for the comparison dimensions of the turtle itself - size of flippers in relation to the size of the turtle, etc.
For the back flippers, I can't for the life of me remember what I used, but I'll update this post once I figure it out. In general I made 3 "toes" pointed towards the back, and cut the inside edge so that it would lay flush with the body of the turtle.
For the tail, I took a small chunk of fondant, rolled it, then using my fingers, just tapered the tip into a sort of oval and pointed tip and cut the base so that, again, it would lay flush with the body.
For the turtle head, I took a chunk of green fondant and rolled it into sort of a teardrop shape, thicker on one end and more narrow on the other end, and then flattened the top, bottom and sides, rounding the edges, and brought the tip into a point. I took a craft stick (can also use a toothpick, a sandwich pick or a Popsicle stick) and pushed it into the back of the head. This will be used to keep the head in place, once it's pushed into the cake.
I used a toothpick to make the nostrils and then used the side of the same toothpick and pressed it along the pointed tip, to make a mouth, to make a wide, lazy mouth. And I was sure to pull up on the corners of the mouth slightly to make it look like a lazy smile.

I was super nervous to start, but I kept telling myself that it's ok, and that if I messed up, IT'S JUST FONDANT, I can roll it out and start again!
The Eyes:
Lately, I've seen "eye candies" sold in the cake sections of craft stores, but I made the eyes for the turtle before those came onto the store shelves. I like to have the flexibility to create my own, so I can give the eyes some emotion and life.

Plus, the larger the pupils are to the size of the eyeball the "cuter"
the animal looks. Have you seen Puss In Boots, when he makes his pupils
huge? Then you know what I'm talking about.

Eyes How To:
I rolled out a bit of white fondant and used one of my wide open frosting tip to punch out two white eyeballs. I took a slightly smaller frosting tip and punched out some pupils from thinly rolled fondant. For the eyelids, to keep the lazy, relaxed theme going, I punched out a thinly roller out piece of green fondant, the same size as the white eyeballs and cut it in half.

I stacked the black circles onto the white and let them dry a bit. You can brush a bit of water onto the white circles before putting the black ones on top to make it stick better.

I adhered it to the sides of the turtle head with a tiny bit of clear piping gel.
The Shell:
First, I baked a 4" cake then carved out a hump on one side. Once it looked like the general shape of the humped back of a sea turtle, I crumb coated it.

I cut out a octagon (8 sides) from a 6" circle of rolled out white fondant.

This gives me the general size of the "inner" hexagons, so that they all fit on the turtle's back. Then cut out 3 hexagons (6-sides) - about 2" each. Then 4 more, slightly smaller.

[I'm selling a template of these in my Etsy shop: HERE] (***coming soon***)

Arrange onto the top of the 4" cake:

Lay the 6" green "turtle shell" onto the 4" cake, with the hexagons in place. But first, roll out a strip of green fondant and wrap it around the sides of the 4" cake, so that the white crumb coating on the sides doesn't show, once it's on top of the cake.

Smooth the circle onto the top of the 4" cake, slightly pressing in between the hexagons to bring out the shapes.

For the rest of the cake decorations, I used the Wilton Fondant Silicone Sea Life Mold, to form the sand dollars, starfish, coral and sea shells, in different colored fondant.

For the hibiscus flower, I couldn't find a mold that I liked, so I made a template and printed it out on cardstock.

Once printed, cut out the flower, carefully to retain the outline details. I ended up not using the stamen cut out, but I did use it for size reference, so don't throw it out! More on the stamen application later.

I laid the flower template out onto a rolled out piece of fondant (you can use any color for the hibiscus!) I then pressed the template slightly into the fondant, to leave an outline.

I then used a cutting mat and a clean Xacto knife to cut out the hibiscus.

In order to get a "realistic look" in the center of the flower, I used the Wilton Flower Impression Mat Set to imprint the inner wrinkles. I laid the fondant flower face down onto the mat and gently pressed in the middle of the flower to transfer the impression.

Then I let dry. If you're smarter that I am, you'll only let it partially dry, so that it will still be flexible once you put it on the sides of the cake, so that it will bend with the curve of the cake. As you can see below, mine dried perfectly flat, so they stuck out from the cake:

Now, for the stamen. I ended up using a small circular tip to freehand the stamen "stick", and a smaller circular frosting tip to add the "dots" to the end of the stamen. Again, you can use any color combination, but I used white because I wanted the turtle to be the star of the cake show.
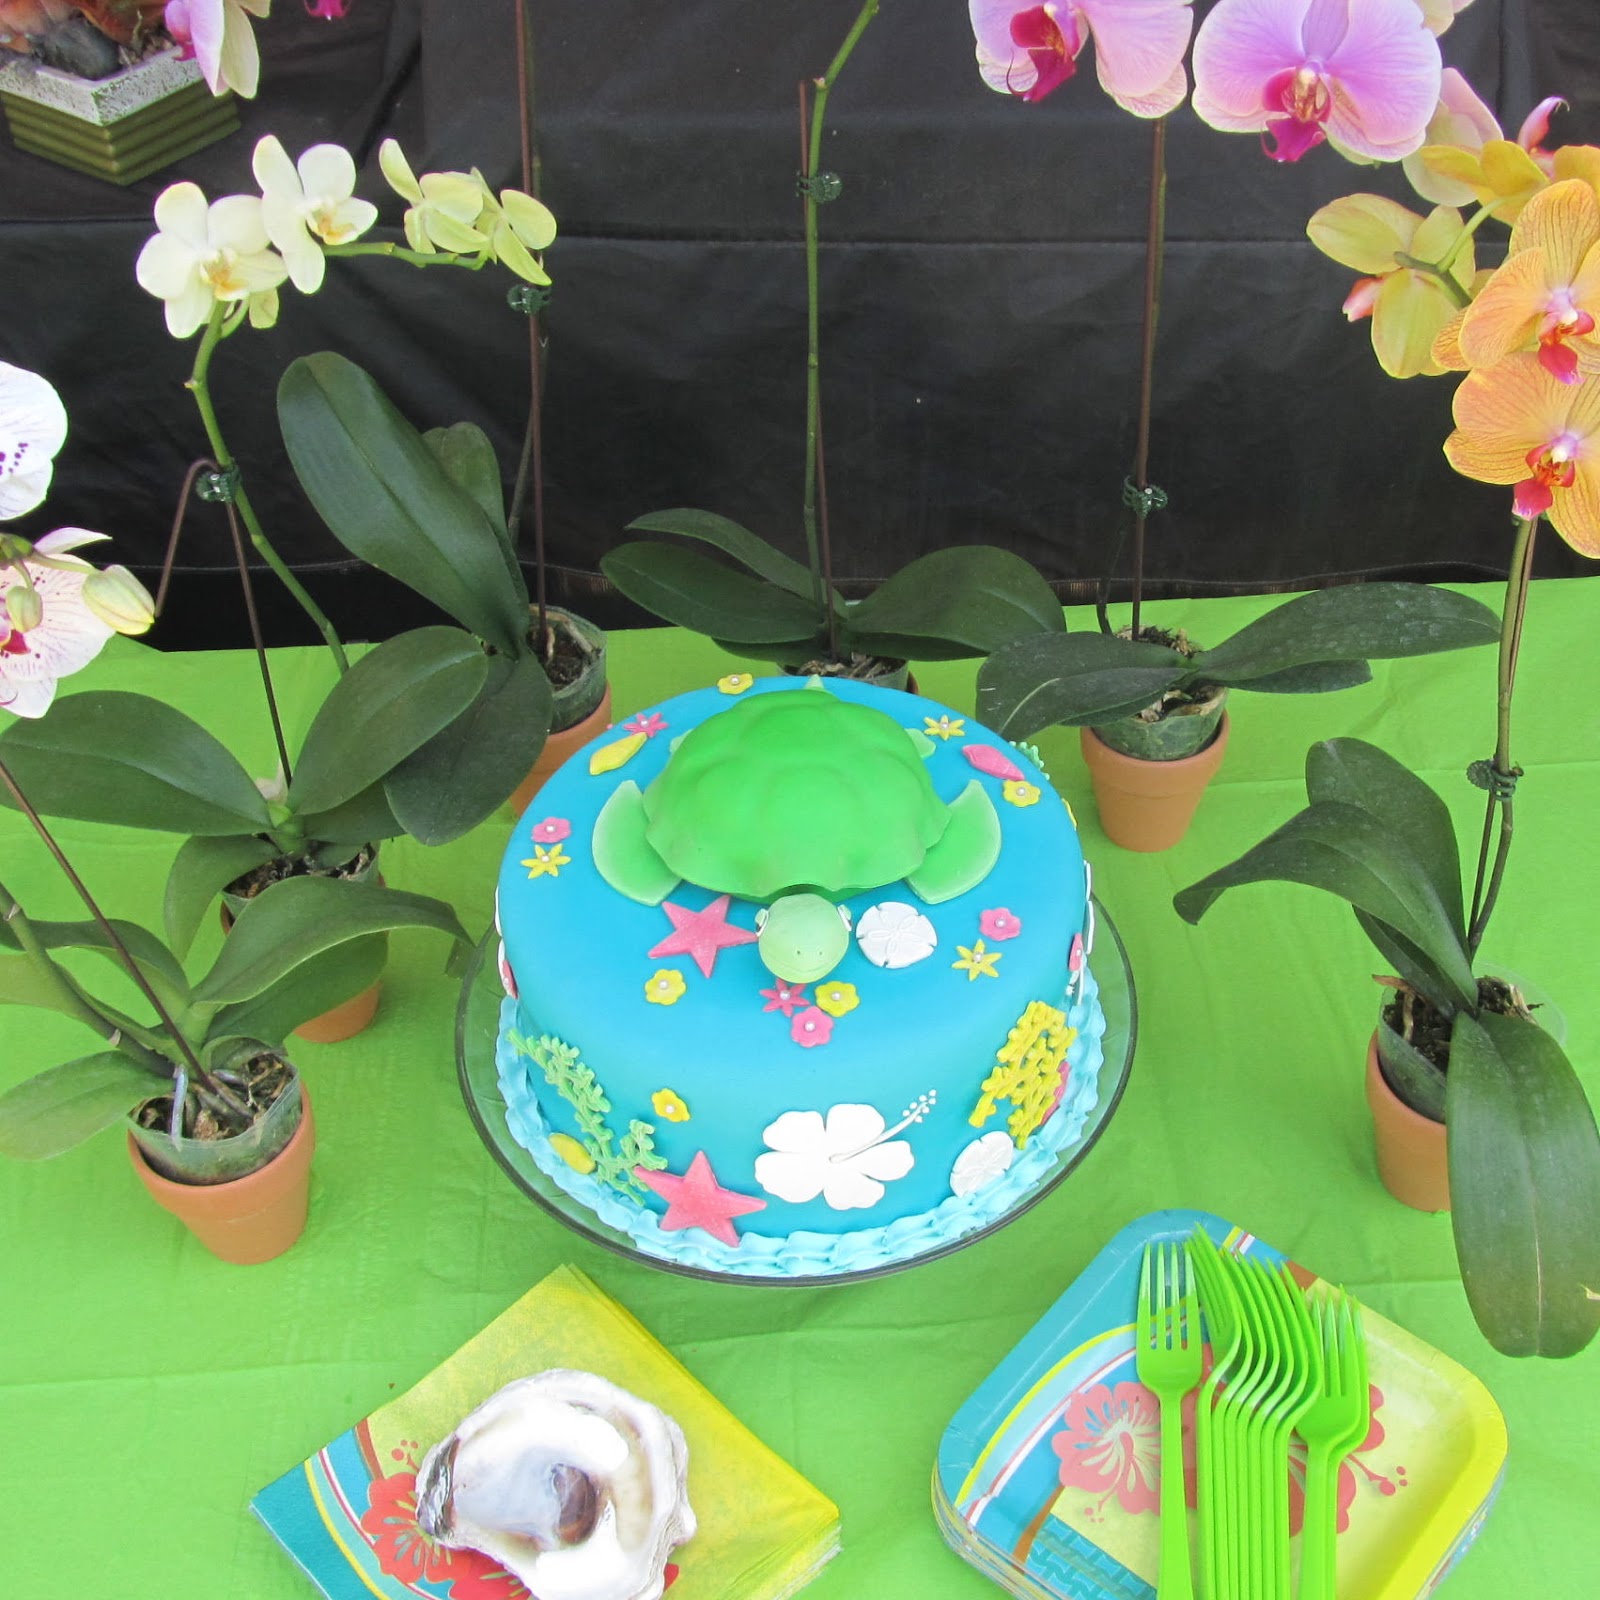
For the "waves" at the base of the cake, I again used the teal Wilton food gel color and created a lighter shade of teal, than the fondant covering, and used the shell technique, with Wilton frosting tip # 21, to create the waves.

I placed the turtle body in the center of the top of the cake, after I laid the blue fondant down. I pushed in the turtle head at a 45 degree angle coming out from the body. I laid the flippers and tail down, as well.
The white frosting was showing after I put the turtle shell on, so I wrapped the 4" cake with a strip of fondant.


Please post your links of your own sea turtle cake into the comments!
I'd love to see them!
Happy sea turtle cake making!!


